On this page
- Step 1: Make sure the SBOM is worth analysing
- Step 2: Generate a better SBOM where needed
- Step 3: Match vulnerabilities and licences
- Step 4: Prioritise by real risk, not CVSS
- Step 5: Confirm the risky ones by testing
- Step 6: Record the outcome in VEX
- Step 7: Fix, regenerate and keep it running
- Common SBOM analysis mistakes
- Where SBOM analysis fits with other testing
- Frequently asked questions
Most teams that generate an SBOM run it through a scanner once, get a long list of CVEs and stop there. The SBOM goes into a folder for the auditor, and nobody acts on it. That is not SBOM analysis. Analysis is the work that decides which of those findings matter, proves it, and keeps the answer current.
If you are new to SBOMs, start with what an SBOM is. This guide assumes you have one, or can generate one, and walks through how Sumrite consultants analyse it.
Step 1: Make sure the SBOM is worth analysing
Analysis of a bad SBOM gives confident but wrong answers. Before matching a single CVE, check three things.
Is it valid? Run it through the official schema validator for its format. Malformed files are common, especially when SBOMs are converted between formats or edited by hand.
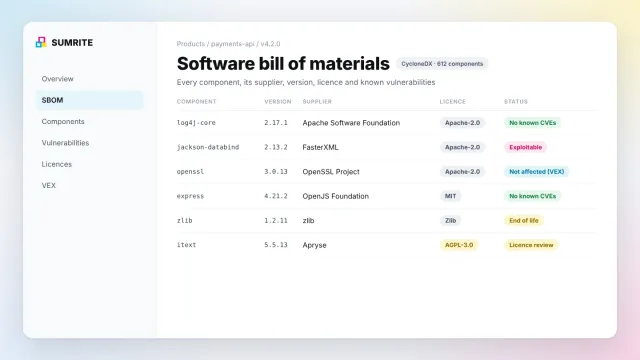
Does it have the minimum elements? Every component should have a supplier, name, version, a unique identifier (a package URL, or purl, is best), a hash and a licence. Components without a purl or CPE cannot be matched to vulnerabilities reliably, so they silently drop out of the results. The open-source tool sbomqs gives a quick quality score:
# Score an SBOM for completeness and quality
sbomqs score sbom.cdx.json

# Count components, and list any without a purl
jq '.components | length' sbom.cdx.json
jq -r '.components[] | select(.purl == null) | .name' sbom.cdx.json
Does it match the real build? This is where most SBOMs fail. Compare the component list with the lock files, the container image layers or the firmware image. Look specifically for:
- Transitive dependencies missing because the SBOM was generated from a manifest, not a lock file or build
- Vendored or copied code sitting in the repository without a package manager entry
- Statically linked C and C++ libraries, such as OpenSSL, zlib or libcurl, that source-based tools cannot see
- OS packages in the container base image, left out by an application-only scan
- Wrong versions, where the SBOM shows the version requested rather than the version resolved
Source SBOMs miss what the build adds
An SBOM generated from source code describes what developers asked for. A build or analyzed SBOM describes what you actually ship. For containers and firmware, always generate from the final artefact as well, and compare the two.
Step 2: Generate a better SBOM where needed
If the SBOM fails step 1, regenerate it from the artefact you ship. Three widely used open-source generators:
# Syft: container image or directory to CycloneDX
syft registry.example.com/payments-api:4.2.0 -o cyclonedx-json=sbom.cdx.json
syft dir:. -o spdx-json=sbom.spdx.json

# Trivy: container image to CycloneDX
trivy image --format cyclonedx --output sbom.cdx.json registry.example.com/payments-api:4.2.0

# cdxgen: source repository (many languages) to CycloneDX
cdxgen -o sbom.cdx.json .
For firmware and closed-source binaries, use binary composition analysis, which identifies libraries from their code signatures rather than from package metadata. This is where hardware and IoT products hide most of their outdated code, and it is a core part of Sumrite’s IoT and hardware security testing.
Step 3: Match vulnerabilities and licences
Feed the SBOM into one or more vulnerability matchers. Using two tools and comparing them is worth the extra minute, because each uses different databases and matching logic.
grype sbom:./sbom.cdx.json -o table
trivy sbom sbom.cdx.json
Matchers draw on the NVD, the OSV database and GitHub Security Advisories, plus vendor feeds for operating system packages. Expect duplicates and some false matches, especially for components identified by CPE rather than purl.
At the same time, review licences. Flag:
- Strong copyleft licences (for example GPL and AGPL) in software you distribute or offer as a network service
- Unknown or missing licences, which cannot be assessed at all
- Conflicting licences that cannot legally be combined in the same product
And flag component health: end-of-life versions that will never be patched, packages with no maintainer activity, and packages pulled from unofficial sources or with names one character away from a popular package (typosquatting).
Step 4: Prioritise by real risk, not CVSS
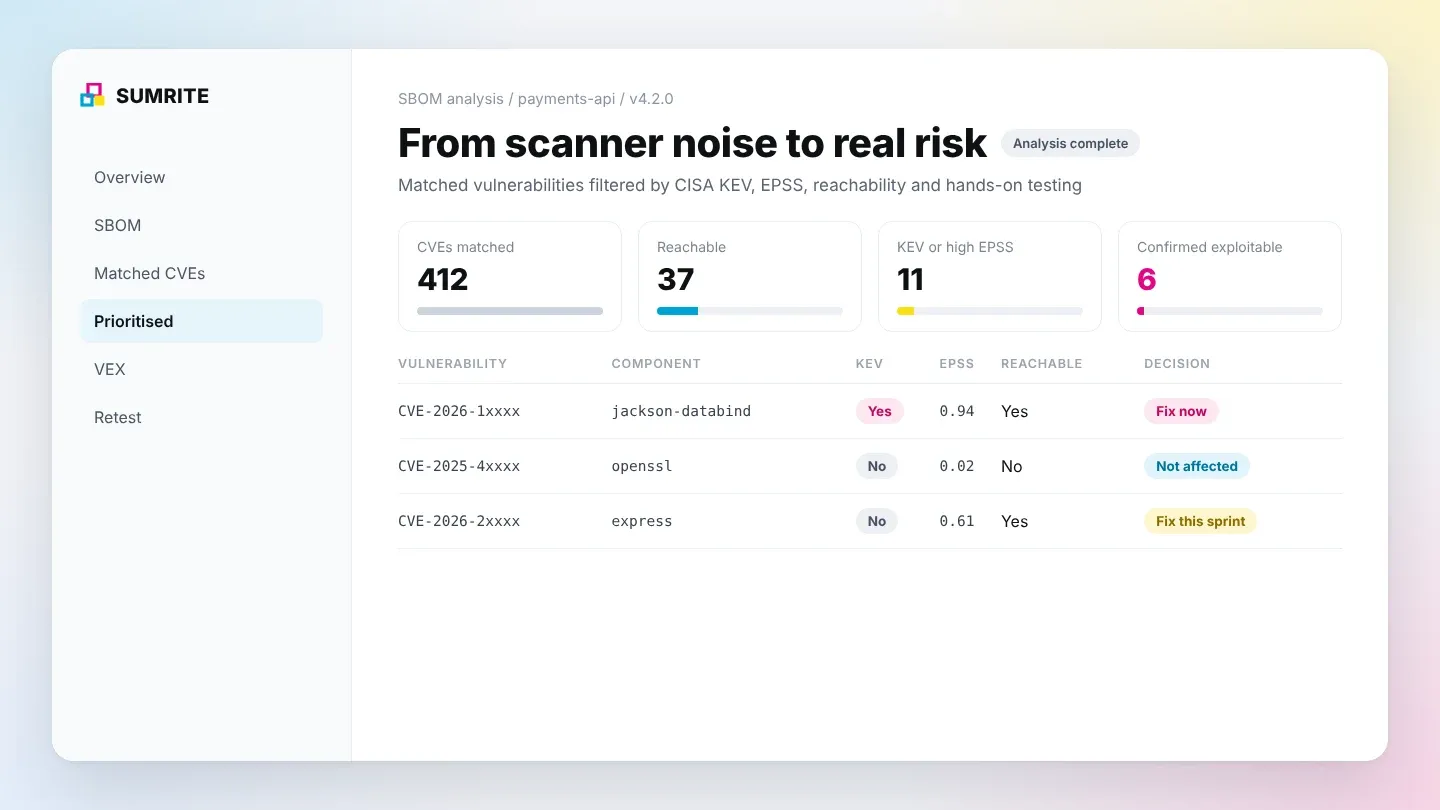
This is the step that separates useful SBOM analysis from a scanner export. A medium-sized application routinely matches several hundred CVEs, and a large share will be rated high or critical by CVSS. Nobody can fix all of them this sprint, and most do not need fixing at all.
Use three signals, in this order:
1. CISA KEV
exploited in the wild
Is the CVE in the CISA Known Exploited Vulnerabilities catalogue? If so, it is being used in real attacks. Fix first.
2. EPSS
probability, 0 to 1
FIRST’s Exploit Prediction Scoring System estimates the probability of exploitation in the next 30 days. Use it to rank everything not in KEV.
3. Reachability
can it be triggered here?
Is the vulnerable function loaded and callable with input an attacker controls? A critical CVE in code your product never calls is not urgent.
Reachability is the hardest of the three. Some commercial tools estimate it automatically by tracing call graphs. Manually, a consultant checks whether the vulnerable class or function is imported and used, whether the feature is enabled in your configuration, and whether untrusted input can reach it.
Then add your own context: is the component in an internet-facing service or an internal batch job? Does it handle personal or payment data? A reachable flaw in a customer-facing API outranks the same flaw in an offline admin tool.
Step 5: Confirm the risky ones by testing
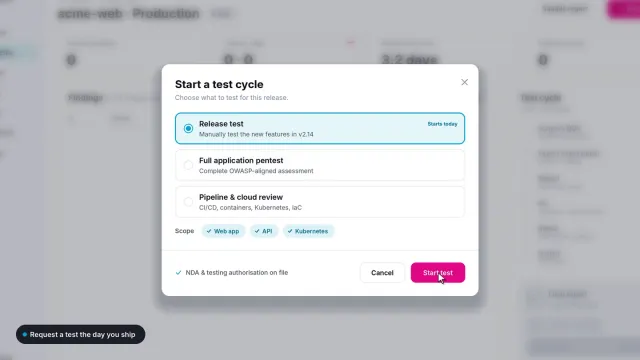
For the short list that survives step 4, confirm exploitability in a running environment. This is where SBOM analysis meets penetration testing: a Sumrite tester attempts the exploit against a staging copy of the application, using the public proof of concept where one exists, and records whether it works, what it gives an attacker and which configuration change or upgrade stops it.
This step also catches the opposite case, where a vulnerability the tools rated as unreachable can in fact be triggered through an unexpected path.
To give a sense of scale, an illustrative mid-sized Java and Node.js application might match around 400 CVEs, keep a few dozen after KEV, EPSS and reachability, and end with a handful confirmed exploitable by testing. Your numbers will differ, but the shape is common: the funnel narrows sharply at every stage.
Step 6: Record the outcome in VEX
Every decision you made in steps 4 and 5 belongs in a VEX document, so that customers, auditors and your own team do not have to repeat the analysis. Each statement says whether the product is not affected, affected, fixed or under investigation for a given vulnerability, with a justification.
# OpenVEX statement with vexctl: the vulnerable code is never executed
vexctl create \
  --product="pkg:oci/payments-api@sha256:…" \
  --vuln="CVE-2026-12345" \
  --status="not_affected" \
  --justification="vulnerable_code_not_in_execute_path"
CycloneDX can carry the same information in its vulnerabilities section, using analysis states such as not_affected, exploitable and resolved. Whichever format you choose, keep a short human-readable reason with each “not affected” decision. Auditors will ask for it.
Publish VEX with the SBOM
If you share an SBOM with customers without a VEX, each customer will scan it, find the same 400 CVEs and send them back to you as questions. Shipping the VEX with the SBOM answers those questions before they are asked.
Step 7: Fix, regenerate and keep it running
Fix in order of priority: upgrade or replace the component, apply a vendor patch, or apply a configuration mitigation and record it in the VEX. Then regenerate the SBOM, because upgrades change transitive dependencies, and re-run the analysis to confirm the fix did not bring in something new.
To make this continuous rather than a yearly exercise:
- Generate an SBOM on every build in CI and store it with the release artefacts.
- Load SBOMs into a monitoring platform such as OWASP Dependency-Track, which re-checks every stored SBOM as new vulnerabilities are published.
- Set policy gates: fail the build on a KEV-listed vulnerability or a banned licence.
- Review supplier SBOMs at purchase and renewal, using the same steps.
- Run a deeper manual review before major releases, audits and customer security reviews.
This fits naturally with continuous penetration testing in CI/CD: the pipeline keeps the SBOM current, and testers confirm exploitability when something serious appears.
Common SBOM analysis mistakes
Mistakes we see in client SBOMs
- Trusting the first scanner output. Hundreds of CVEs, no triage, no action.
- Ranking by CVSS only. Teams burn weeks on unreachable criticals while a KEV-listed medium stays open.
- Analysing a source SBOM for a container. The base image OS packages, often the biggest source of findings, are missing.
- No VEX. The same questions come back from every customer and auditor.
- One-off SBOMs. An SBOM from last quarter describes software you no longer ship.
- Ignoring supplier software. Your own code may be clean while the vendor product beside it is years out of date.
Where SBOM analysis fits with other testing
SBOM analysis covers the code other people wrote. It will not find access control flaws, insecure APIs or business logic bugs in the code your team wrote. For that you still need secure source code review and penetration testing. Together they cover both halves of the application, and regulators that ask for SBOMs, such as SEBI under CSCRF, also expect regular VAPT. See the full list in SBOM requirements in 2026.
Sumrite’s SBOM analysis service runs every step in this guide for you: we generate or validate SPDX and CycloneDX SBOMs for applications, containers and firmware, rank risk with KEV, EPSS and reachability, confirm exploitability by hands-on testing, issue VEX and retest after fixes.
Sources: CISA Known Exploited Vulnerabilities catalogue · FIRST EPSS · OpenVEX specification · CycloneDX vulnerability exploitability (VEX) · OWASP Dependency-Track · OSV database
Frequently asked questions
What is SBOM analysis?
SBOM analysis is the review of a software bill of materials to confirm it is complete and accurate, identify vulnerable, end-of-life and risky-licence components, and decide which vulnerabilities are actually exploitable in the product. The results are a prioritised fix list and VEX statements.
How do I check if an SBOM is complete?
Validate it against the SPDX or CycloneDX schema, check that each component has a supplier, version, purl or CPE, hash and licence, then compare it with the real build: lock files, container layers and binaries. Missing transitive dependencies, vendored code and statically linked libraries are the most common gaps.
Which tools are used for SBOM analysis?
Common open-source tools are Syft, Trivy and cdxgen for generation, Grype, Trivy and OSV-Scanner for vulnerability matching, sbomqs and the CycloneDX and SPDX validators for quality, and OWASP Dependency-Track for continuous monitoring across many SBOMs. Commercial software composition analysis platforms add reachability and policy features.
How do you prioritise vulnerabilities found in an SBOM?
Start with vulnerabilities in the CISA Known Exploited Vulnerabilities catalogue, then those with a high EPSS score, then check reachability: whether the vulnerable code is loaded and can be triggered with attacker-controlled input. CVSS alone produces too many high and critical results to act on.
What is a VEX and when do I need one?
A VEX (Vulnerability Exploitability eXchange) is a machine-readable statement of whether a product is affected by a specific vulnerability, with a justification. You need one whenever you share an SBOM, so customers and auditors can see which scanner results do not apply.
How often should SBOM analysis be done?
Generate and analyse an SBOM on every release, and re-check existing SBOMs whenever new vulnerabilities are published, ideally daily and automatically. A deeper manual review is worth doing before major releases, audits and supplier onboarding.